Table of Contents
- Introduction
- What Are Laser-Cut Wooden Keychains?
- Benefits of Laser-Cut Wooden Keychains
- How to Create Custom Wooden Keychains
- Tools and Materials Needed
- Step-by-Step Guide to Making Laser-Cut Keychains
- Conclusion
- FAQs
Introduction
Laser-cut wooden keychains are a unique and creative way to express individuality or create thoughtful gifts. Whether you’re crafting them for personal use or as a small business venture, these keychains offer endless customization options. This guide will walk you through everything you need to know about creating custom wooden keychains using a laser cutter, including tools, materials, and step-by-step instructions.

What Are Laser-Cut Wooden Keychains?
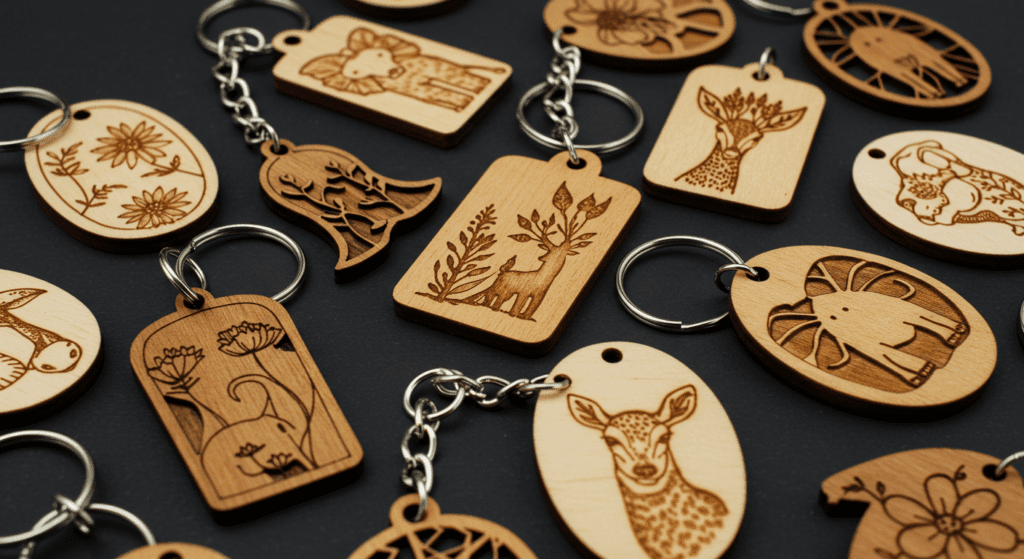
Laser-cut wooden keychains are small, personalized items made by using a laser cutter to engrave or cut designs into wood. These designs can include names, initials, meaningful symbols, or intricate patterns. The precision of laser cutting ensures clean edges and detailed artwork, making each keychain a one-of-a-kind piece.
Benefits of Laser-Cut Wooden Keychains
- Personalization: Add names, initials, or custom designs to create unique keepsakes.
- Durability: Wood is a sturdy material that can withstand daily wear and tear.
- Eco-Friendly: Wood is a sustainable and biodegradable material.
- Versatility: Suitable for gifts, promotional items, or personal accessories.
- Affordability: Low-cost materials make it an accessible craft or business idea.
How to Create Custom Wooden Keychains
Creating custom wooden keychains involves designing, cutting, and assembling the pieces. Here’s a breakdown of the process:
Tools and Materials Needed
- Laser Cutter: Access to a laser cutter (available at local maker spaces or workshops).
- Wood Sheets: Thin plywood or basswood sheets are ideal for laser cutting.
- Design Software: Software like Adobe Illustrator, CorelDRAW, or free alternatives like Inkscape.
- Keychain Hardware: Split rings, jump rings, or lobster clasps.
- Sandpaper: For smoothing rough edges.
- Finishing Supplies: Wood stain, varnish, or paint (optional).
Step-by-Step Guide to Making Laser-Cut Keychains
Step 1: Design Your Keychain
- Use design software to create your custom design. Include names, initials, or symbols.
- Ensure the design fits within the desired keychain size (typically 1.5 to 3 inches).
Step 2: Prepare the Laser Cutter
- Load your design file into the laser cutter software.
- Adjust settings such as power and speed based on the thickness of the wood.
Step 3: Cut the Design
- Place the wood sheet on the laser cutter bed.
- Start the cutting process and monitor it to ensure precision.
Step 4: Sand and Finish
- Sand any rough edges for a smooth finish.
- Apply wood stain, varnish, or paint if desired.
Step 5: Assemble the Keychain
- Attach the keychain hardware (split ring or clasp) to the cut piece.
- Your custom wooden keychain is now ready to use or gift!
Conclusion
Laser-cut wooden keychains are a fantastic way to combine creativity with functionality. Whether you’re making them for personal use, as gifts, or to sell, the process is simple and rewarding. With the right tools and a bit of imagination, you can create stunning, personalized keychains that stand out.
FAQs
1. What type of wood is best for laser-cut keychains?
Thin plywood or basswood is ideal due to its ease of cutting and durability.
2. Do I need a laser cutter to make wooden keychains?
While a laser cutter provides precision, you can also use a scroll saw or CNC router as alternatives.
3. Can I paint or stain my wooden keychains?
Yes, you can customize your keychains with wood stain, paint, or varnish for a unique finish.
4. Where can I find a laser cutter?
Check local maker spaces, libraries, or workshops that offer access to laser cutting equipment.
5. Are laser-cut wooden keychains durable?
Yes, when properly finished, wooden keychains are durable and can last for years.